
Simplify Your Business. Delight Your Customers. - Wati
Wati is an all-in-one business marketing suite that helps you automate sales, marketing, and customer support on WhatsApp. Create powerful chatbots, manage all your conversations from a single dashboard, and reach more customers with bulk messaging campaigns.
8/22/20253 min read

How to Add a Manual Contact to Wati
For adding one or a few contacts at a time, the manual method is quick and straightforward.
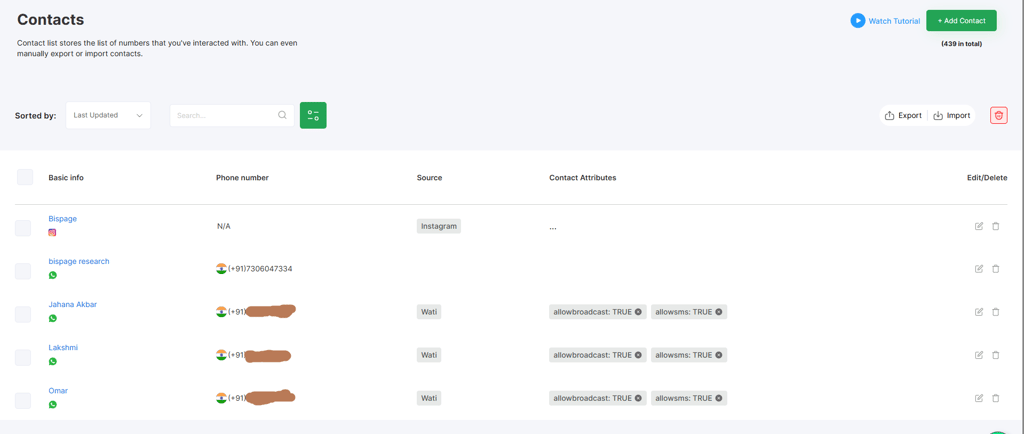
Go to the Contacts Section: In your Wati dashboard, navigate to the Contacts page.
Click the "Add" Button: Look for a button or an icon (often a + symbol) to add a new contact.
Enter Contact Details: A form will pop up.
Enter the full phone number, including the country code, in the designated field.
Enter the contact's name.
Wati will also let you add other attributes, such as email, city, and a custom allow broadcast setting (which allows you to send mass broadcasts to this number).
Add Custom Attributes: You can create and add custom attributes (like City, Preferred Language, etc.) directly from this form. This helps you segment your contacts for future marketing campaigns.
Save: Once you have entered all the details, click "Save" to add the new contact to your list
This is the most common method for businesses to get their existing contact lists into Wati.
How to Import Contacts to Wati (Bulk Upload)
Navigate to the Contacts Section: Log in to your Wati dashboard and find the Contacts option in the main navigation bar.
Initiate the Import: On the contacts page, you will see an "Import" button. Click on it to begin the process.
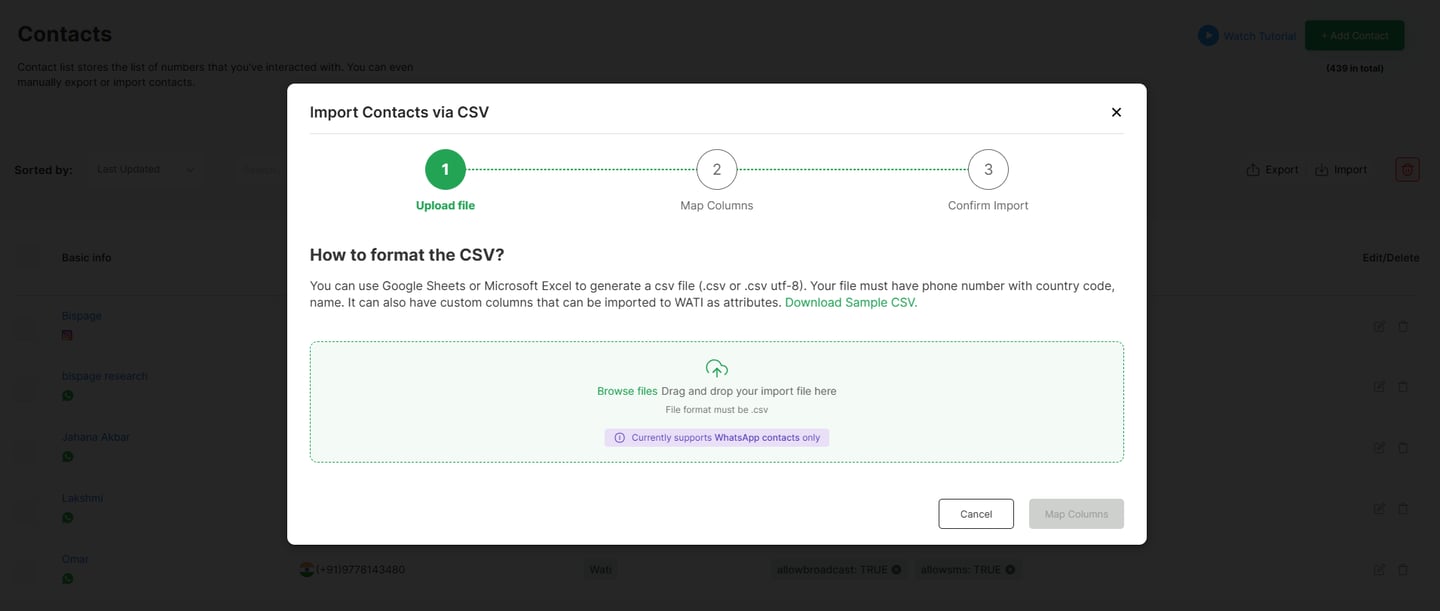
Download the Sample CSV:
Wati provides a sample CSV file to ensure your data is formatted correctly. This is a crucial step to avoid import errors. Download this file and use it as your template.Prepare Your CSV File:
Open the downloaded CSV file.
Mandatory Columns: The Name and Phone columns are required. You must have data in these two fields for every contact.
Phone Number Formatting: The phone number must be broken into two separate columns: CountryCode and Phone. For example, for an Indian number, 91 would be in the CountryCode column and 9876543210 would be in the Phone column.
Add Custom Attributes: You can add additional columns for other contact attributes (e.g., Email, City, Language, Date of Birth, etc.). Wati allows you to map these to existing or new custom attributes during the import.
Clean the Data: Before uploading, remove any duplicate contacts and ensure there are no extra spaces in your column headers, as this can cause the import to fail.
Upload the File: Once your CSV is ready, go back to Wati's import page and upload the file.
Map Columns: After the upload, a "Map Columns" option will appear. This is where you match the columns in your CSV to the corresponding fields in Wati. Make sure you correctly map the Name and Phone fields. You can also map any custom attributes you added.
Confirm and Import: Once the mapping is complete, click "Confirm Import" and then "Proceed to Import."
Review the Report: Wati will generate a report after the import, showing you how many contacts were added, how many were updated, and if there were any invalid entries.
How to Export Contacts from Wati
This is a frequently asked question, and based on Wati's available help center articles, the process is not as straightforward as a bulk contact list export.
Wati’s primary export feature is for chats, not the full contact list. This function is designed for record-keeping and data backup.
To export chat history, you must be on one of their paid plans (Professional, Growth, Pro, or Business).
The process to export chats is as follows:
Go to Settings and then Import/Export Chats.
Click the "Start Export" button.
You will receive an email with a link to download a .zip file containing your chat history in .txt format. Each file is named after the contact's phone number.
If you need to export your entire contact list, you may need to rely on other methods:
Using Wati's API: For more advanced users, the Wati API can be used to retrieve contact information. This would require some development work or a third-party tool.
Integration with a CRM: If you've integrated Wati with a CRM (like Salesforce, HubSpot, or Capsule), you can often manage and export your contact list directly from the CRM. This is a common workaround for businesses that need to sync and export data from multiple platforms.
For a full contact list export feature, it is best to check with Wati's support team to see if this functionality is available in your specific plan or if there's a feature on their roadmap to address this.
